-
OverView Of Warehouse POS
-------------------------------------------------------------
We do lot of efforts to bring traffic in our store, For this, Tmd Warehouse POS come with a easy solution, that make easier your store and managing products/options stocks in different warehouses that help you control multiple inventory locations easily.
Warehouse Pos Stock Management provides facility to store manager to effectively manage stock in different warehouses pos. The facility provides multiple warehouse pos management for products and options level stock, module track warehouse sale report, quick warehouse stock assignment, reduction of order stock etc.
Warehouse Pos
Installation of Warehouse Pos 4.x.x
-
First of all install the POS module and setup it, after that install the warehouse POS module and then it will start working.
Step 1: Zip Folder

Step 2
Go To Admin Panel > Extensions > Installer > Click Blue Button

Step 3: Upload TMD poswarehouse Theme Zip

Step 4: After zip Upload Click Green Install Button

Step 5: Show Message (Success: The extension has been installed!)

Step 5
Go To Admin Panel > Extensions > Extensions > Select Module > Click Tmd Warehouse Setting Green Install Button

First Generate Key then Enable Status and Then Save It

Step 6: show menus

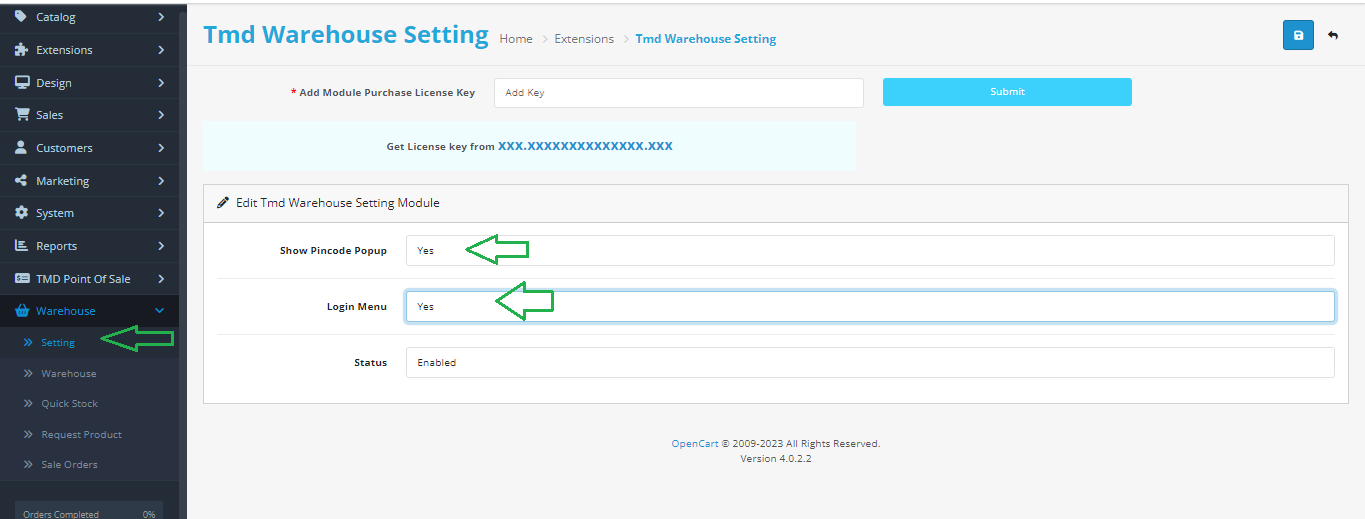
Step 7: Setting Menu > Select Show Pincode Popup, Login Menu then save it
Step 8: Warehouse Menu > Click Add New Button


Step 9: Quick Stock Menu > Add warehouse QTY, SKU & UPC then click gren button

Show Success Msg Then Click Print Button


Step 10: Pos Setting Menu > show warehouse Tab

Step 11: Enter Pincode and Click submit

Step 12: Click Warehouse Menu

Warehouse Login Account

Warehouse Dashboard

Installation of Warehouse Pos 3.x.x
-
-
Step 1: Zip Folder

Step 2: One Folder

Step 3
Upload these folder by ftp correct location for example (admin to admin, image to image , system to system) (no core file effect)

Step 4
Go To admin Panel > Extensions > Modifications > Click On Refresh Button

Step 5
Go To Admin Panel > Extensions > Extensions > Select Module > Click on Pos Green Install Button

Step 6
Go To Admin Panel > System > users > User Groups > Click on Select All and Save It

Step 7: Menus

Step 8: Pos Setting Menu > Click Add Discount Button


Step 9: Pos Menu

Pos Page

Click Any Category

Click Info Button

Click Add To Cart Button

Click Paynow Button

Click Order Now Button

Click Print Icon

Print Page

Step 10 : Inventory Barcode Menu


Step 11 : Warehouse Menu > Click On Add New Button


Step 12 : Pos User Menu > Click On Add New Button


Step 13 : Warehouse Stock Menu > Click On Add New Button


Click Transfer Button and change new warehouse


Step 14 : Warehouse Dashboard

-
Contact Us
If you have question which is beyond this knowledgebase Kindly contact us
Write to Us Now